6 min read
Mastering the art of bow tie tying opens doors to sophisticated formal wear that sets you apart from the standard necktie crowd. While it might seem daunting at first, learning this skill becomes second nature with proper guidance and practice.
Why Learn to Tie a Bow Tie?
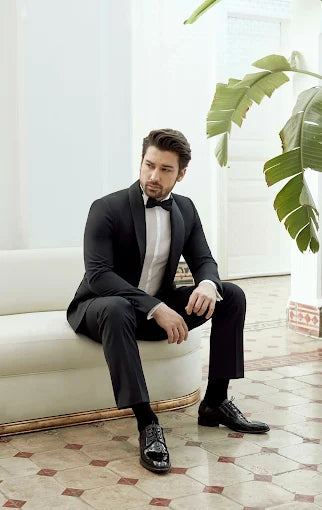
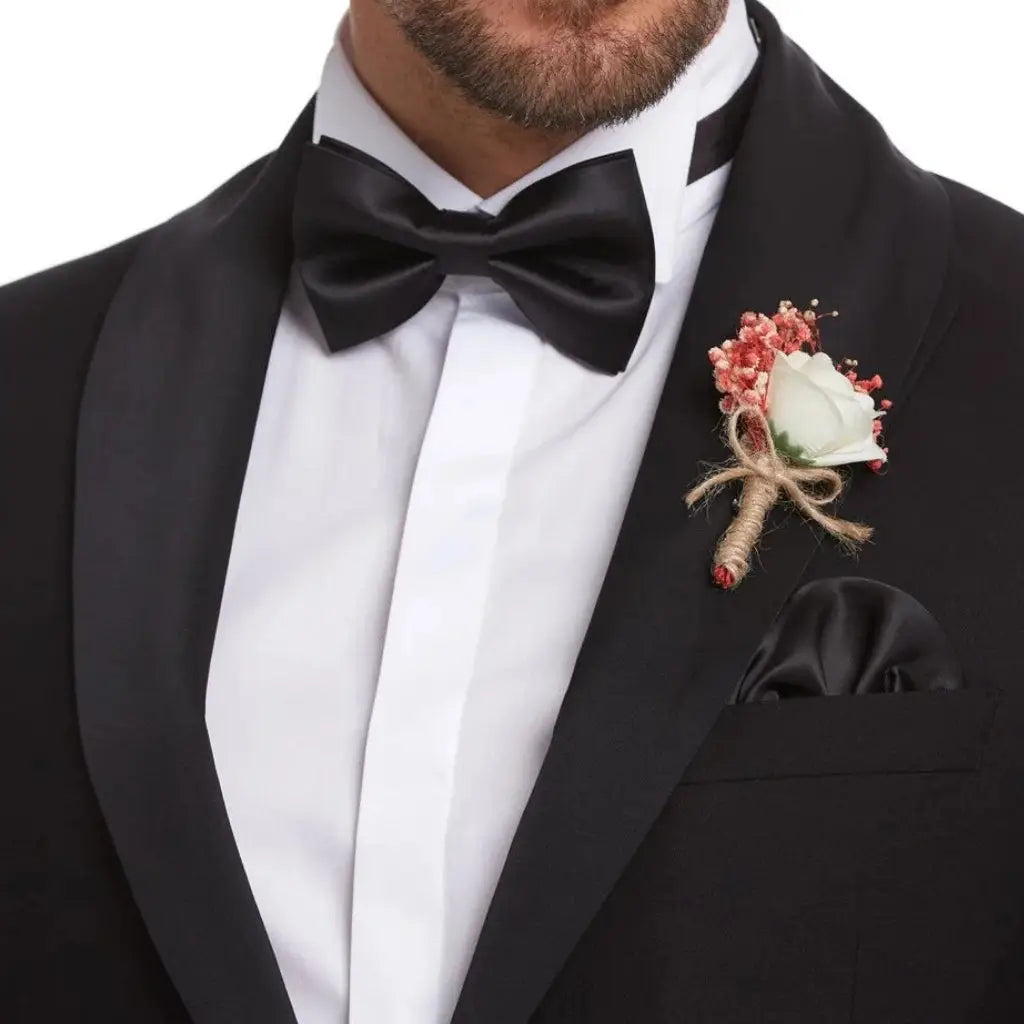
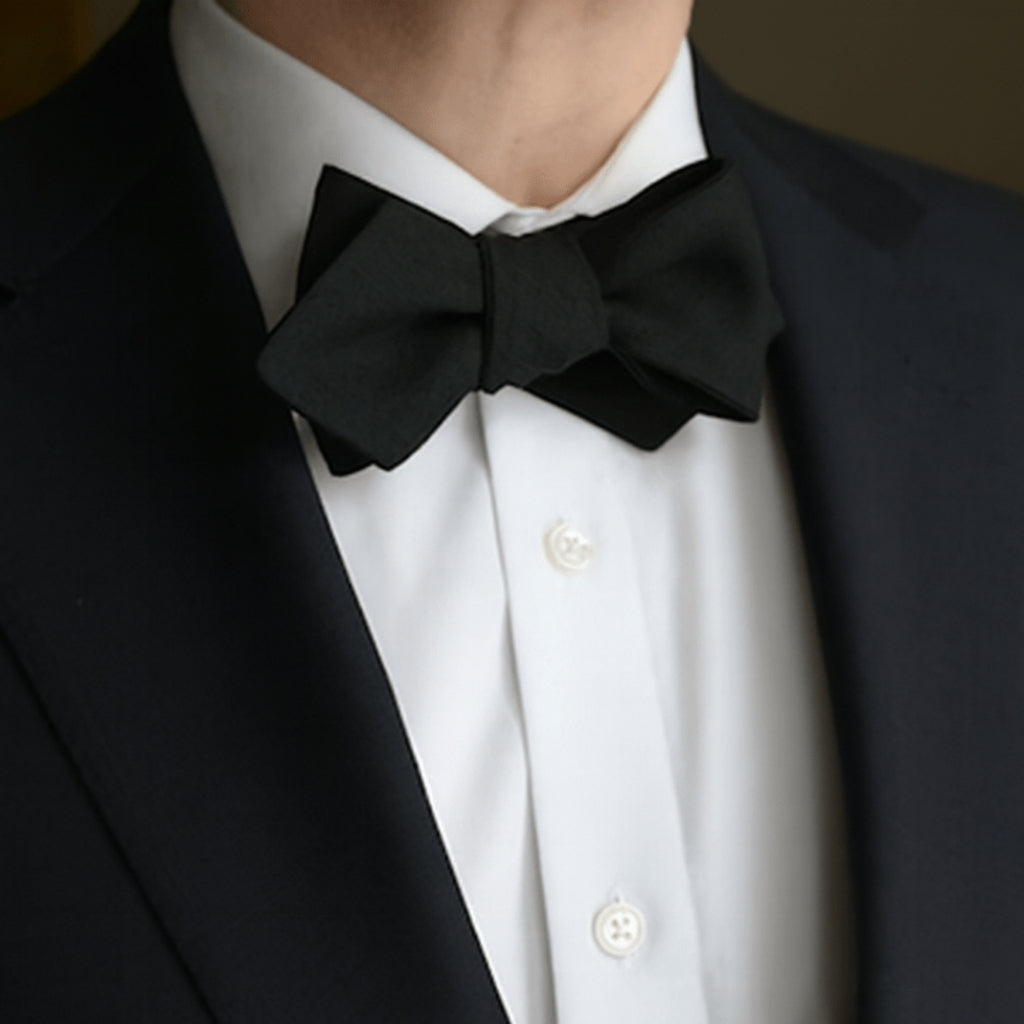
Bow ties represent timeless elegance and personal style. Unlike a regular tie, a bow tie stays perfectly positioned throughout long events, never dips into your soup, and adds a distinguished touch to any formal outfit.
The self-tie bow tie demonstrates authenticity that pre-tied versions simply cannot match. Hand-tied bows have subtle imperfections that create character, while machine-made versions look stiff and artificial. When you tie your own bow tie, you join a tradition of gentlemen who value craftsmanship and attention to detail.
Understanding Your Bow Tie
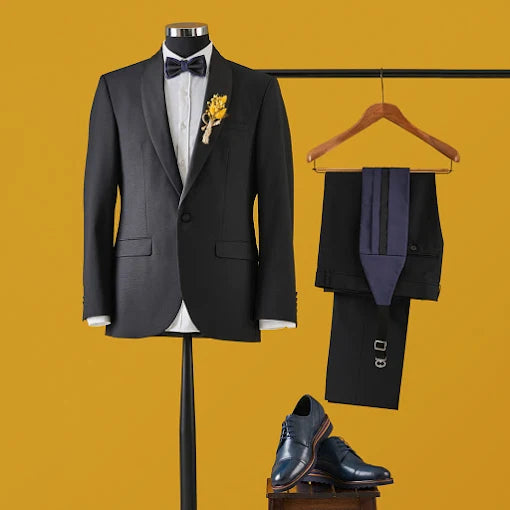
Before diving into the tying process, familiarize yourself with bow tie anatomy. The wider end sits on your right side when you begin, while the narrower end goes on your left. Quality bow ties feature adjustable neck bands with metal hardware that ensures a comfortable fit around your collar.
The fabric choice affects both appearance and tying ease. Silk bow ties offer the most traditional look and moderate stiffness that holds shape well. Cotton versions provide easier handling for beginners but may require more frequent adjustments throughout the evening.
Types & Styles of Bow Ties
Choosing the right bow tie style can dramatically impact your overall appearance and complement your facial features. Each shape creates a different visual effect and suits various occasions and personal preferences. Understanding these distinctions helps you select the perfect bow tie for any formal event, whether you're attending a wedding, gala, or business dinner.
Batwing
The batwing style features straight edges and sharp corners, creating a sleek, modern appearance. This shape works particularly well with contemporary tuxedo styles and slim-fit formal wear. The narrow profile complements men with broader faces and provides a streamlined look.
Hourglass
Hourglass bow ties taper at the center and flare at the ends, creating a classic silhouette that suits most face shapes and formal occasions. This versatile style pairs beautifully with traditional men's suits and works for both black-tie events and semi-formal gatherings.
Pointed
Pointed bow ties feature angled ends that create a vintage-inspired look reminiscent of 1920s formal wear. This dramatic style makes a bold statement and works best with classic tuxedos and formal dress shirt with wing collars.
Step-by-Step: How to Tie a Self-Tie Bow Tie
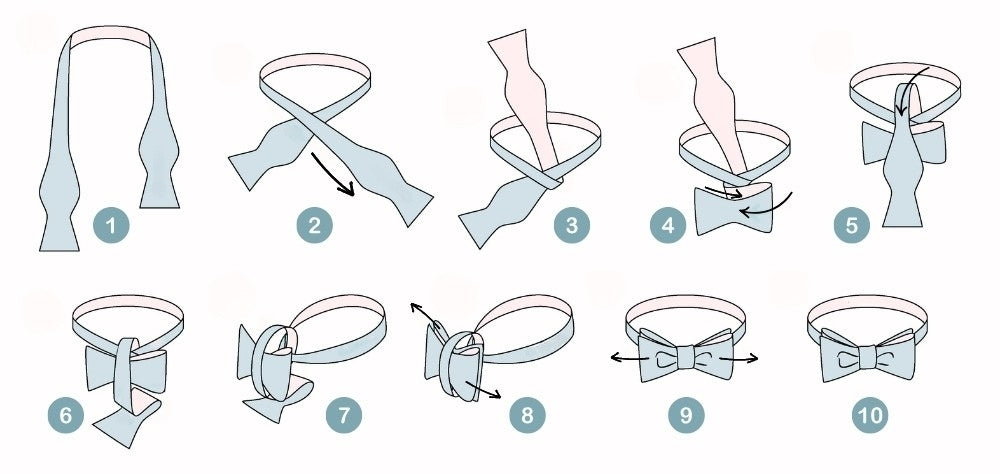
Step 1: Position the Bow Tie Around Your Neck
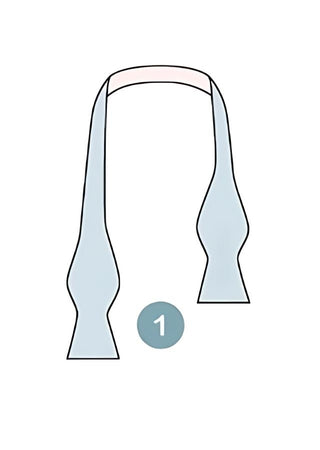
Place the bow tie around your neck with your collar up. Position the wider end on your right side, making it hang approximately 1.5 inches lower than the narrower end on your left side. The bow tie should sit comfortably against your collar.
Step 2: Cross the Wide End Over the Narrow End
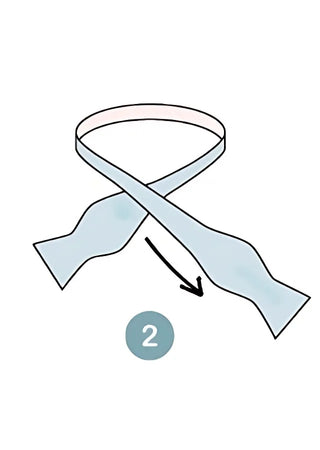
Bring the wider end across and over the narrower end, creating an X-shape just below your chin. The wider end should now be on your left side while the narrower end is on your right. Hold this crossing point firmly.
Step 3: Pull the Wide End Up and Through
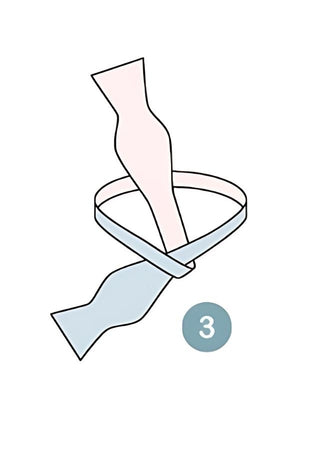
Take the wider end and pull it up through the neck loop from underneath, similar to the first step of tying a shoelace. This creates the foundational knot that will hold your bow tie in place throughout the evening.
Step 4: Create the Front Bow Shape
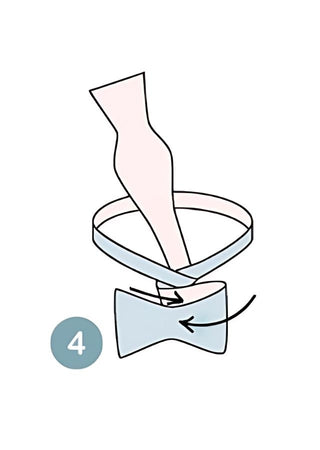
Fold the narrower end (now on your right side) horizontally to form the front wing of your bow tie. The fold should create a neat, symmetrical loop that represents half of your finished bow tie shape.
Step 5: Bring the Wide End Down Over the Center
Take the wider end that's now hanging over your shoulder and bring it straight down over the center of the folded loop you just created. This end will eventually form the back wing of your bow tie.
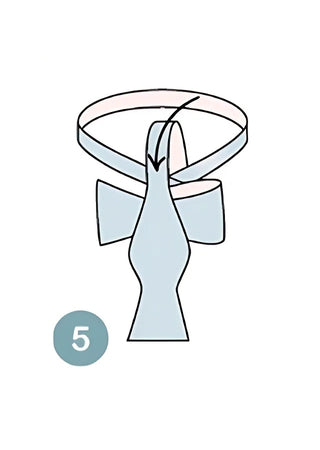
Step 6: Push the Wide End Behind the Folded Loop
Carefully push the wider end horizontally through the loop behind the folded front portion. Work from right to left, threading the end through the small opening behind the center knot. This step requires patience and gentle maneuvering.
Step 7: Fold the Wide End to Create the Back Wing
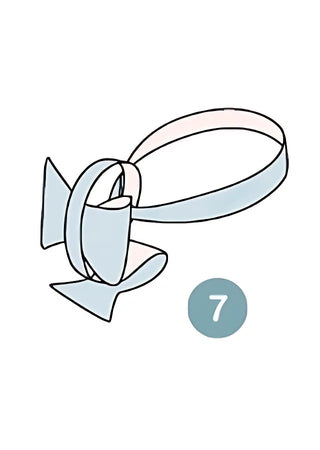
Once the wider end is threaded through, fold it to create the back portion of your bow tie. This fold should mirror the front wing, creating a symmetrical appearance when viewed from the front.
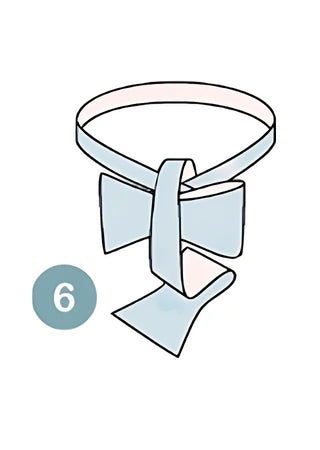
Step 8: Pull and Shape Both Wings
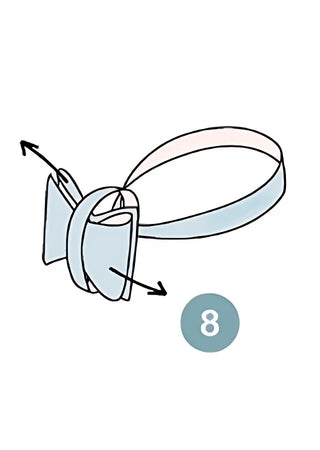
Grasp both bow tie wings and gently pull them in opposite directions to tighten the knot at the center. The wings should be roughly equal in size and shape, though perfect symmetry isn't necessary or expected.
Step 9: Adjust for Balance and Symmetry
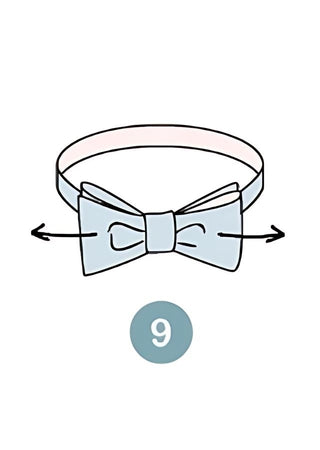
Fine-tune your bow tie by gently pulling on individual wings and adjusting their angles. Make small modifications to achieve balanced proportions while maintaining the natural character of a hand-tied bow.
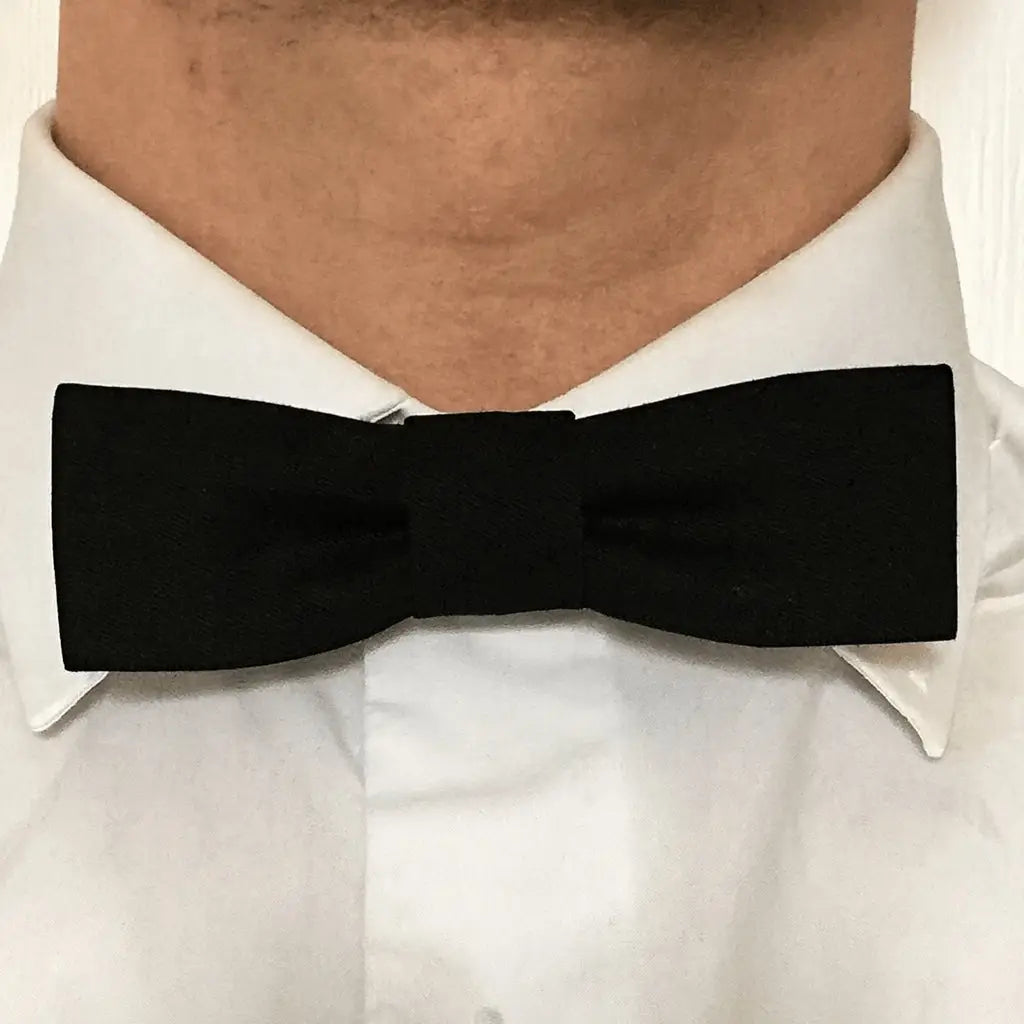
Step 10: Final Positioning and Tightening
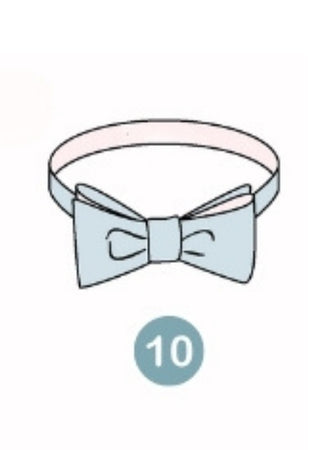
Make final adjustments to ensure your bow tie sits flat against your collar and maintains its shape. The finished bow should have a slight natural asymmetry that demonstrates its authentic, hand-tied nature.
Tips & Tricks for Perfect Bow Tie Knots
Practice with the bow tie laid flat on a table before attempting to tie it around your neck. This allows you to understand the mechanics without the awkward angle of working above your collar. Once comfortable with the movements, transition to tying while wearing it.
Keep your collar points sharp and your shirt properly buttoned. A crisp dress shirt foundation ensures your bow tie sits correctly and maintains its intended appearance throughout the evening.
If your bow tie feels too tight or loose, adjust the neck band rather than retying the entire knot. Most quality bow ties feature enough adjustment range to accommodate different collar styles and personal comfort preferences.
Store your bow ties properly by hanging them or laying them flat in a drawer. Avoid folding the bow portion, as creases can become permanent and affect the way the tie drapes when worn.
See also : Closet Organization: What Guys Should Know
Remember that perfect symmetry isn't the goal – hand-tied bow ties should have subtle irregularities that demonstrate their authentic nature. These small imperfections add character and distinguish your look from mass-produced alternatives.