


10 min read


Quick-step summary
- 01Gather your tools
- 02Measure your chest
- 03Measure your waist
- 04Measure your hips and seat
- 05Measure your shoulders
- 06Measure your sleeve length
- 07Measure your neck
- 08Measure your trouser inseam
- 09Measure your trouser outseam
- 10Record and cross-check all measurements
Contents
What you need before you start
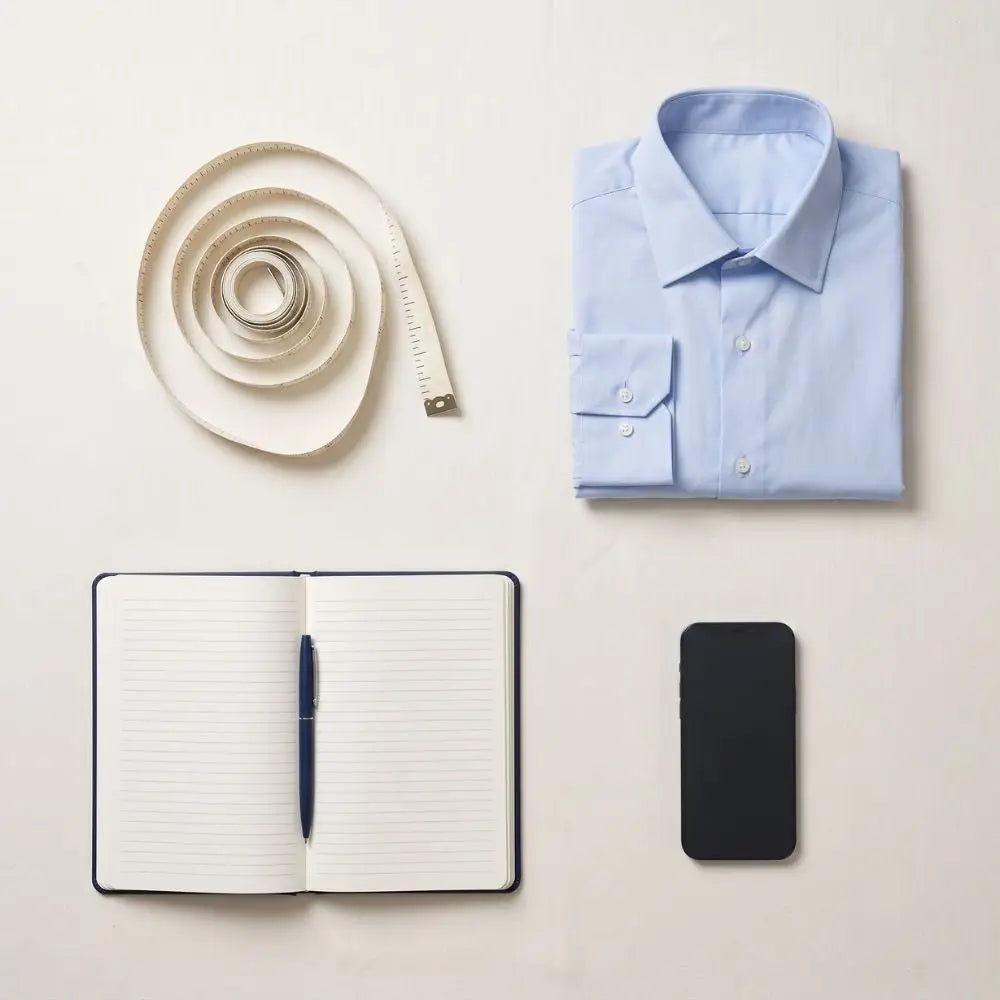
Before taking a single measurement, have these items ready:
Your measuring kit
- A soft measuring tape (the kind used in sewing, not a metal builder's tape)
- A helper, because several measurements are impossible to take accurately alone
- A well-fitting dress shirt or a thin T-shirt to wear during measuring (not a heavy sweater)
- A mirror or phone camera to check tape position
- A pen and paper, or a notes app, to record every figure immediately
- Bare feet or dress shoes if measuring trouser length with shoes in mind
Step-by-step suit measurements
Step 1
Gather your tools
Lay the soft tape measure flat and check that the numbers are legible from both ends. If the tape is older than a few years, replace it, because worn markings cause reading errors that throw off every downstream measurement. Stand on a hard floor, not carpet, to keep posture natural. Wear the same shirt worn when actually dressed for the suit.
Step 2
Measure your chest
The chest measurement determines jacket size more than any other number. Wrap the tape around the fullest part of the chest, just under the armpits and across the shoulder blades. Keep the tape parallel to the floor. Breathe in normally, then exhale and read the tape. Do not pull it tight; one finger should slide underneath without forcing.
Most size charts add 2 to 4 inches of ease to the chest measurement. If the chest reads 40 inches, a size 40 jacket is the starting point, not a guarantee of perfect fit.
Step 3
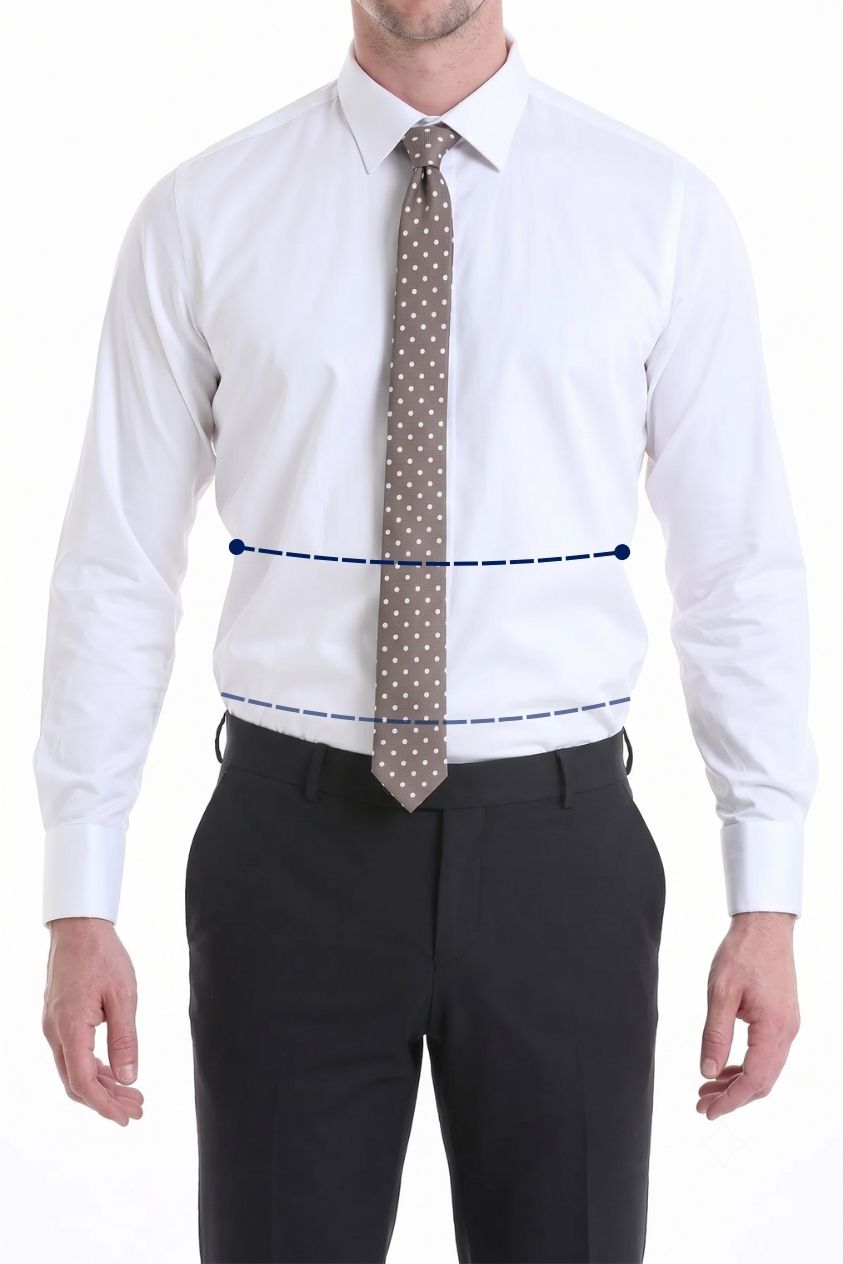
Measure your waist
The jacket waist sits roughly 1 inch above the navel, at the natural narrowing of the torso. Wrap the tape at that point, keeping it level all the way around. Stand straight rather than sucking in. For trouser waist, measure at the point where trousers actually sit, which for most men is an inch or two below the natural waist.
Step 4
Measure your hips and seat
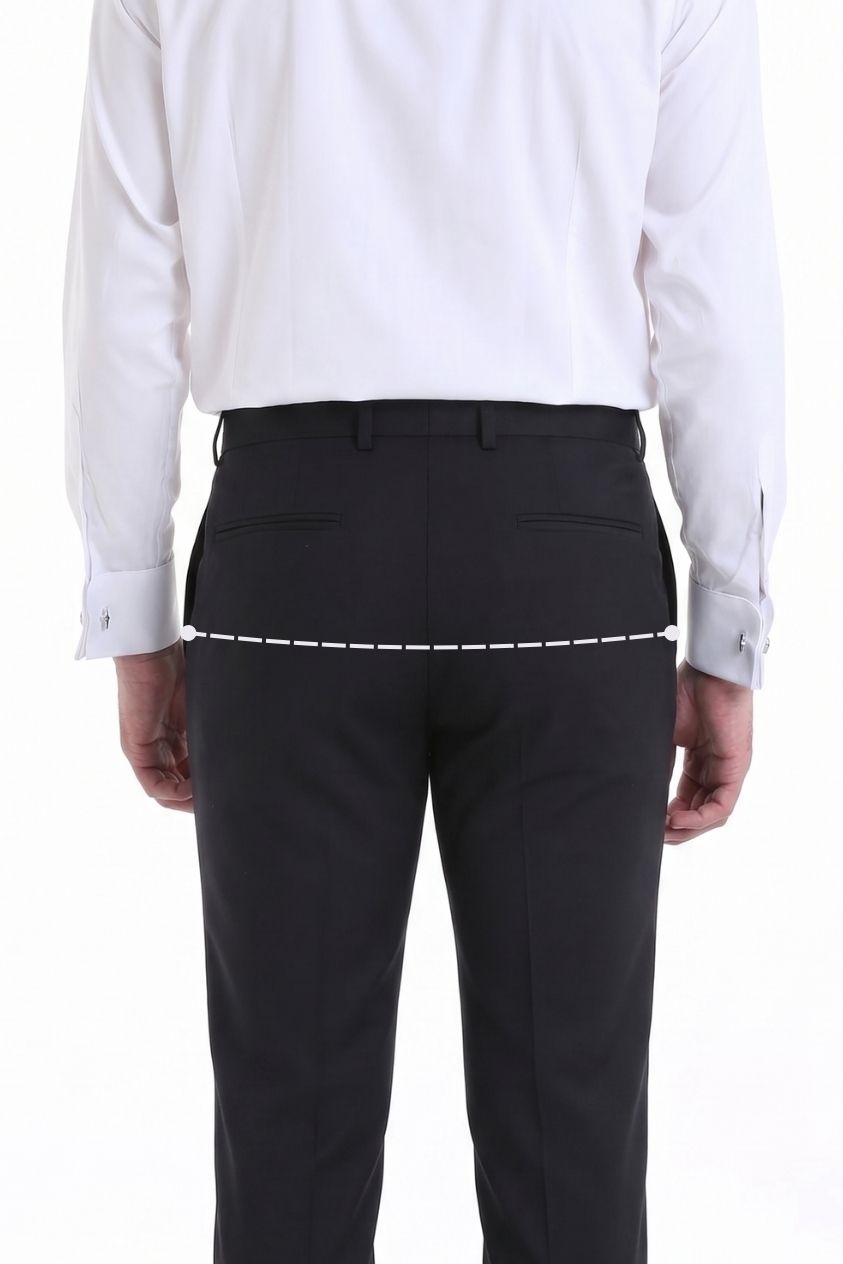
The seat measurement matters for trouser fit. Stand with feet together and wrap the tape around the fullest part of the hips and backside, roughly 8 inches below the natural waist. Keep the tape parallel to the floor. This number stops trousers from being too tight across the seat or pulling at the thighs.
Step 5
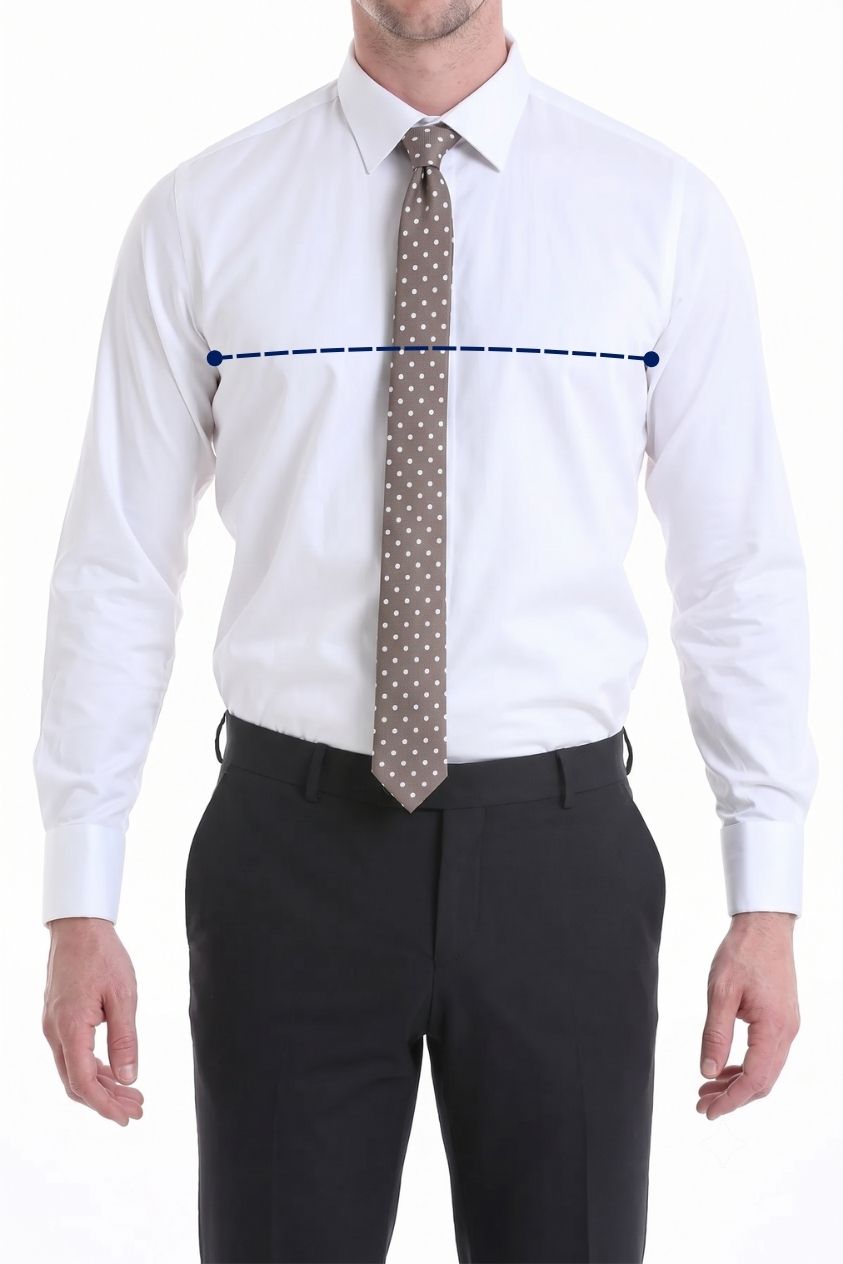
Measure your shoulders
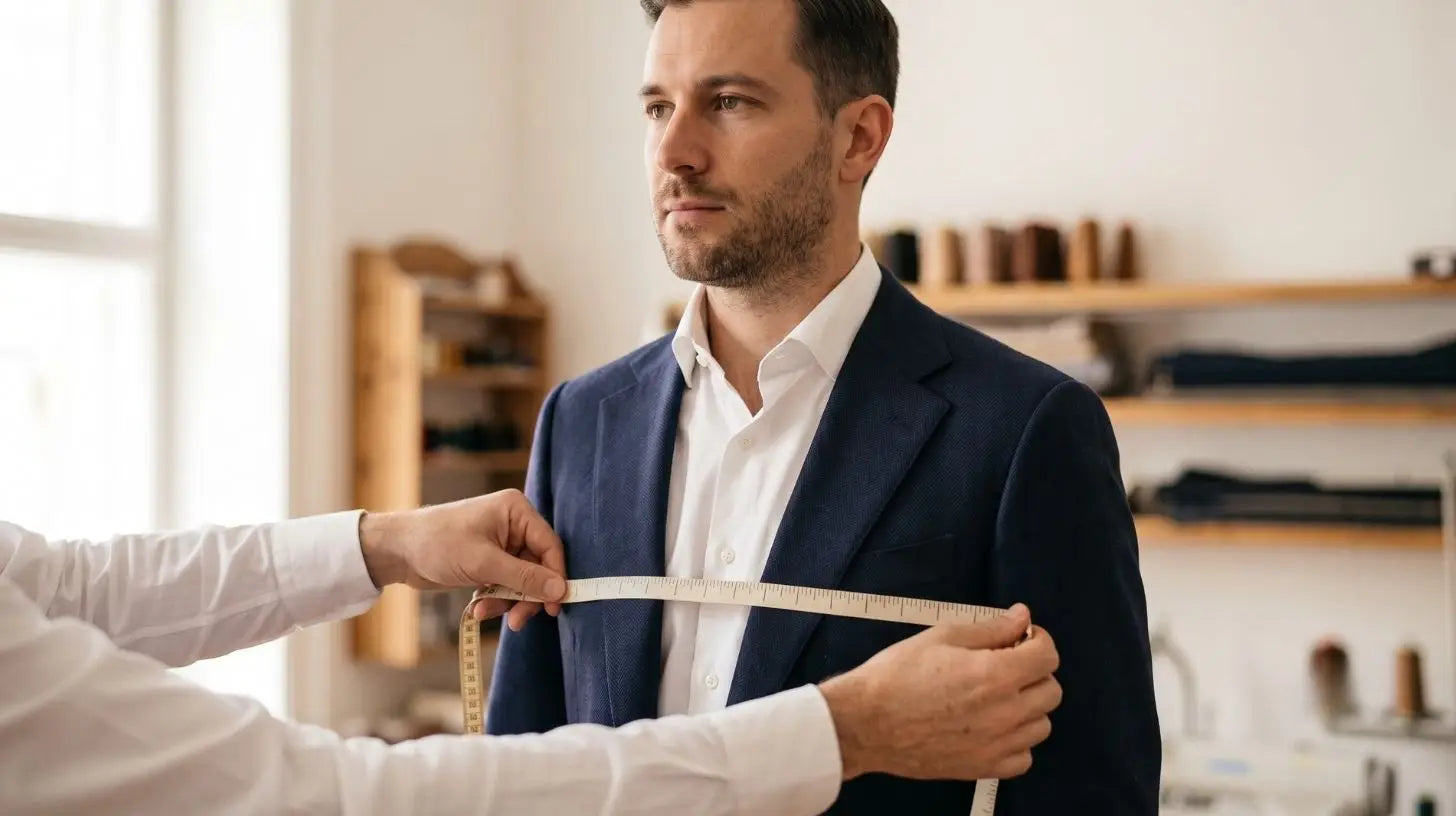
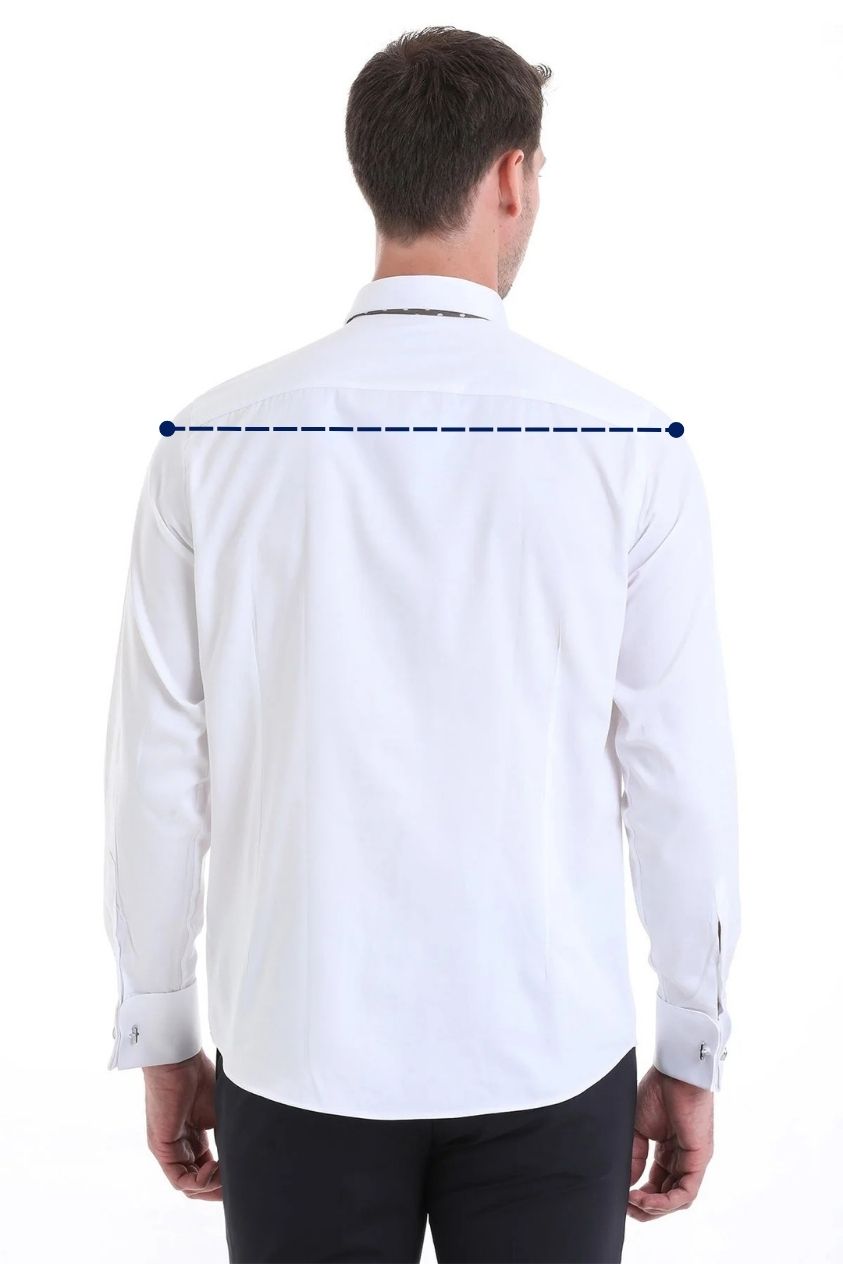
The shoulder width is the measurement most people skip, and it's the hardest alteration a tailor can fix after purchase. With a helper, measure from the edge of one shoulder (the bony point where the arm begins) straight across the back to the same point on the other shoulder. The jacket's shoulder seam must land at this exact point; if it drops onto the arm, the jacket is too large.
A shoulder seam that sits off the shoulder edge cannot be corrected without rebuilding the entire jacket top. Get this measurement right before buying.
Step 6
Measure your sleeve length
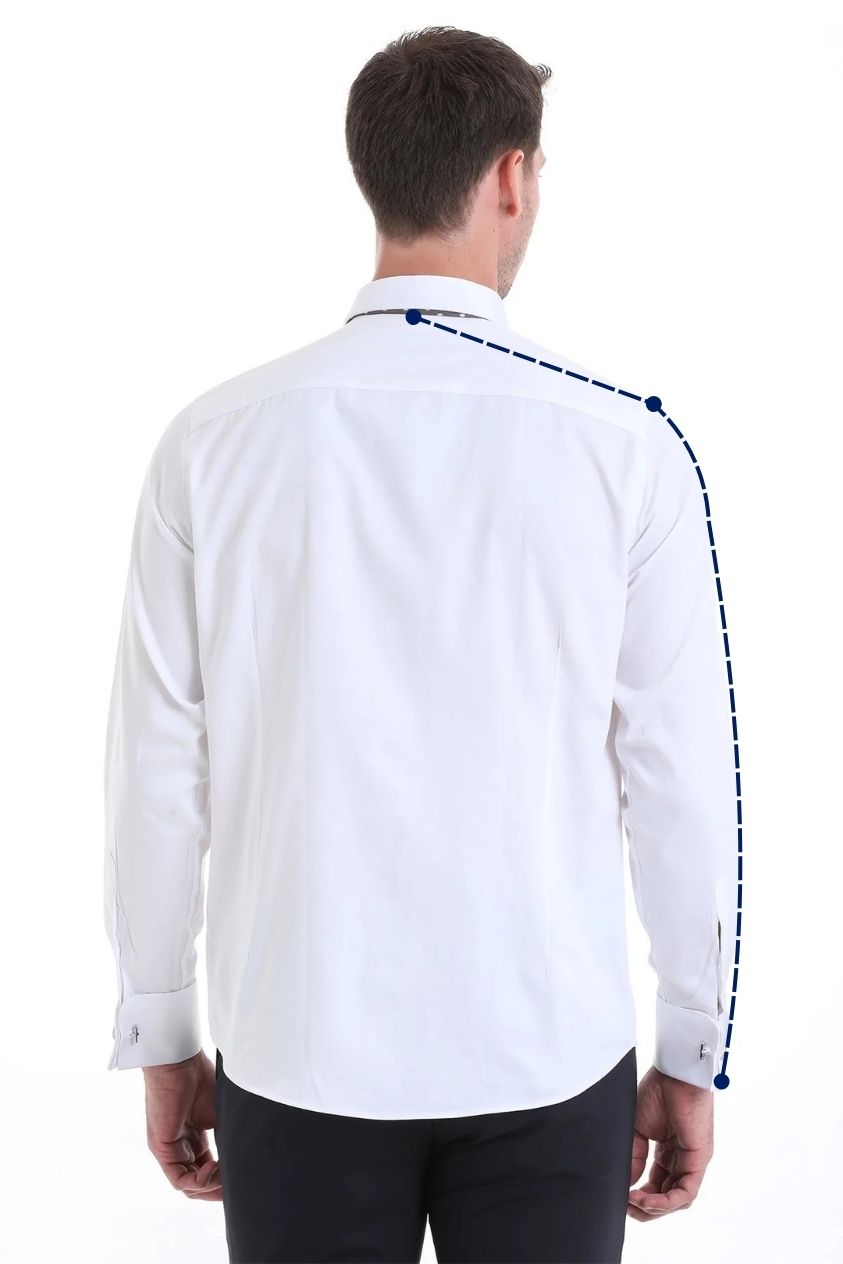
Bend the arm slightly at the elbow. A helper measures from the center back of the neck, across the shoulder point, down the outside of the arm to the wrist bone. This is the shirt sleeve length. For a jacket sleeve, most retailers subtract about 1 inch from this figure so the shirt cuff shows by roughly 0.5 inches below the jacket cuff.
Step 7
Measure your neck
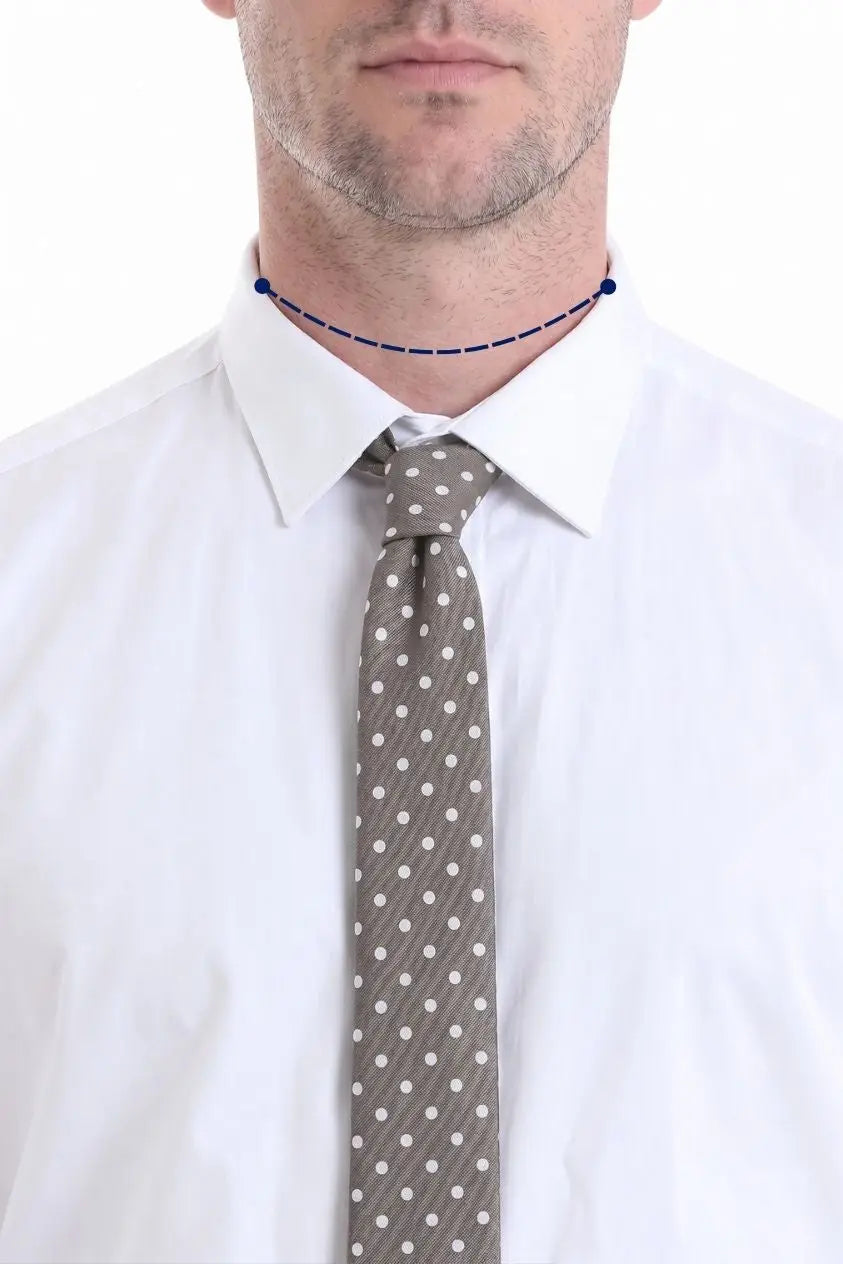
The neck measurement applies mainly to dress shirts worn under the suit jacket. Wrap the tape around the base of the neck, where a collar normally sits. Add 0.5 inches to that number. A shirt collar should allow two fingers to fit between the tape and the neck; anything tighter causes discomfort throughout a long event.
Step 8
Measure your trouser inseam
The inseam runs from the crotch seam down to the ankle. The easiest way is to take a pair of well-fitting trousers, lay them flat, and measure from the crotch seam to the bottom hem. Alternatively, stand straight and have a helper measure from the crotch to the desired hem point. Most men land between 28 and 34 inches.
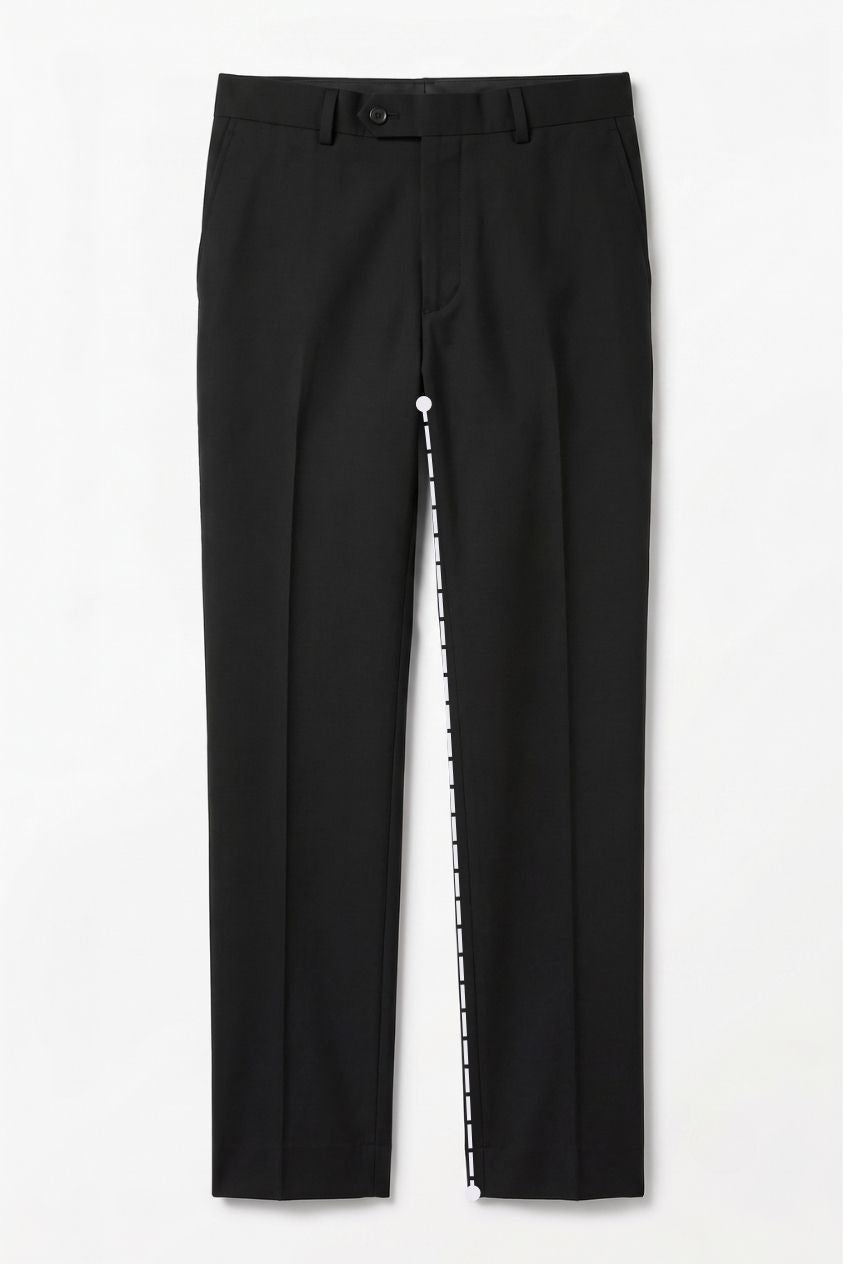
Step 9
Measure your trouser outseam
The outseam runs from the waistband to the hem along the outer leg. This measurement determines the total trouser length. Stand naturally and measure from the top of the waistband down to where the trouser should break at the shoe. A slight break just above the top of the shoe is the standard for a classic suit trouser.
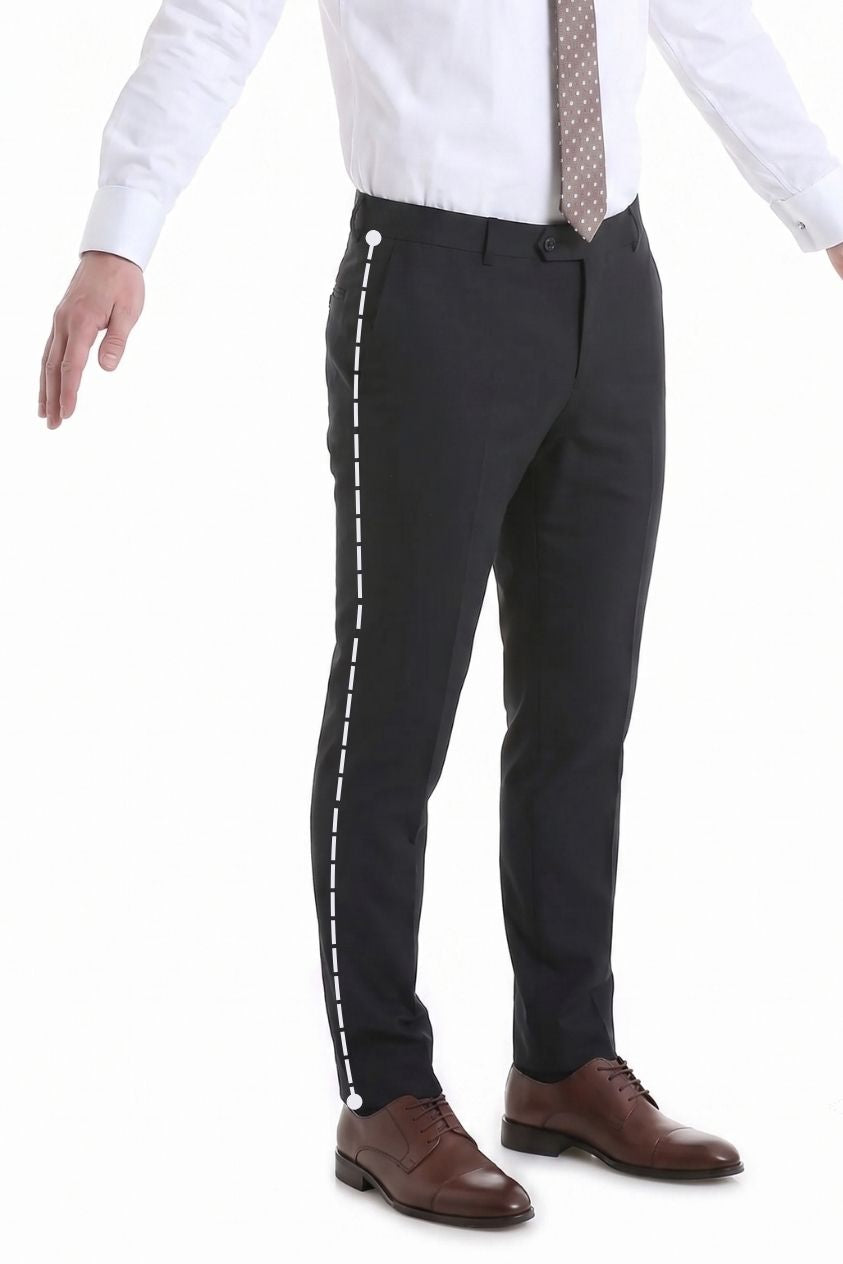
Step 10
Record and cross-check all measurements
Write every number down immediately. Then take each measurement a second time to confirm it within 0.25 inches of the first reading. If two readings differ by more than half an inch, take a third and use the middle value. Keep the final list in one place; most online suit retailers, including SAYKI's full suits collection, provide a size chart that maps directly to these figures.
| Measurement | Where the tape sits | Helper needed | What it sizes |
|---|---|---|---|
| Chest | Fullest part, under the armpits, across the shoulder blades | No | Jacket size |
| Waist | About 1 inch above the navel for the jacket; where trousers sit for the trouser waist | No | Jacket and trouser waist |
| Hips and seat | Fullest part of the hips and backside, roughly 8 inches below the natural waist | No | Trouser seat |
| Shoulders | Edge of one shoulder straight across the back to the other | Yes | Jacket shoulder seam |
| Sleeve length | Center back of the neck, across the shoulder point, down to the wrist bone | Yes | Shirt sleeve, minus about 1 inch for the jacket |
| Neck | Base of the neck where a collar sits, plus 0.5 inches | No | Dress shirt collar |
| Inseam | Crotch seam down to the ankle | Optional | Trouser length, usually 28 to 34 inches |
| Outseam | Top of the waistband down to the break at the shoe | Optional | Total trouser length |
Swipe left to see the full table on mobile.
How to verify the measurements worked
After receiving or trying on a suit, check four points. If all four pass, the measurements were accurate. A single failing point points to exactly which measurement needs adjustment for the next purchase.
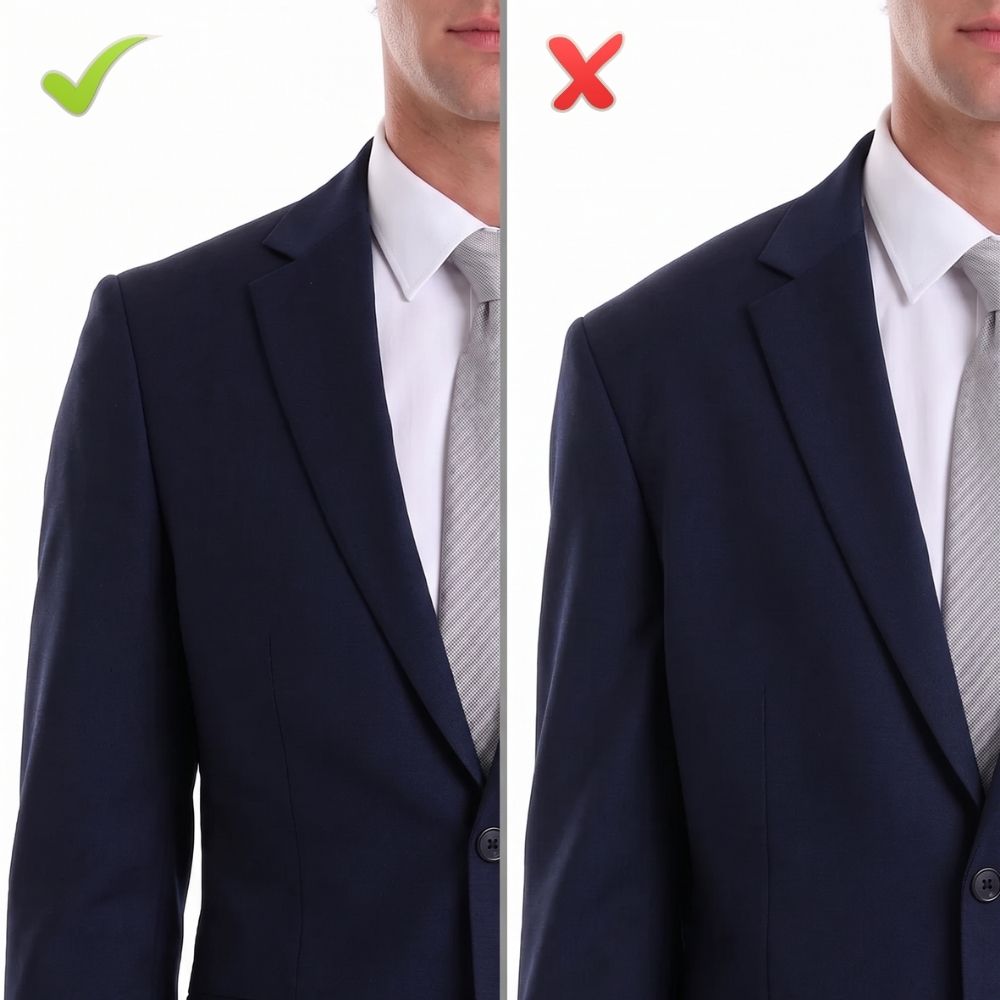
1. The shoulder seam
The jacket shoulder seam sits exactly at the shoulder edge.
2. The collar
The collar lies flat against the shirt with no gap at the back.
3. The button closure
The jacket closes without pulling across the chest.
4. The trouser seat
The trouser seat has no horizontal creasing under the backside.
Common mistakes and how to avoid them
Mistake 01
Measuring over a thick layer
Taking chest and waist measurements over a hoodie or jacket adds 1 to 2 inches of false bulk. Always measure over a dress shirt or thin T-shirt.
Mistake 02
Holding the tape too tight
A tape pulled snug compresses soft tissue and produces a number 1 to 2 inches smaller than the actual circumference. The tape should rest flat, not dig in.
Mistake 03
Measuring alone
Self-measuring the back shoulder width or sleeve length introduces significant error because the tape shifts. A second person is worth the 10 minutes.
Mistake 04
Using a metal tape
Metal tapes don't flex around curves, so chest and hip readings are unreliable. Use a soft cloth or vinyl tape only.
Mistake 05
Forgetting to record immediately
Trying to remember six or seven numbers after the fact leads to transpositions. Write each measurement down before moving to the next.
Mistake 06
Ignoring posture
Slouching during measurement shortens the back length and narrows the shoulder width reading. Stand as naturally upright as possible throughout.
When to measure at home vs visit a tailor
Measure at home
Off-the-rack and online orders
- Buying off-the-rack or made-to-measure suits online
- The body is relatively proportional to standard sizing
- Ordering 2-piece suits from a size chart
- Ordering 3-piece suits from a size chart
Visit a tailor
Fixed dates and in-between sizes
- A specific event with a fixed date less than two weeks away
- Bodies that fall between two standard sizes
- When alterations to the shoulder are anticipated
- Confirming home measurements, which takes about 15 minutes
Editor's Picks

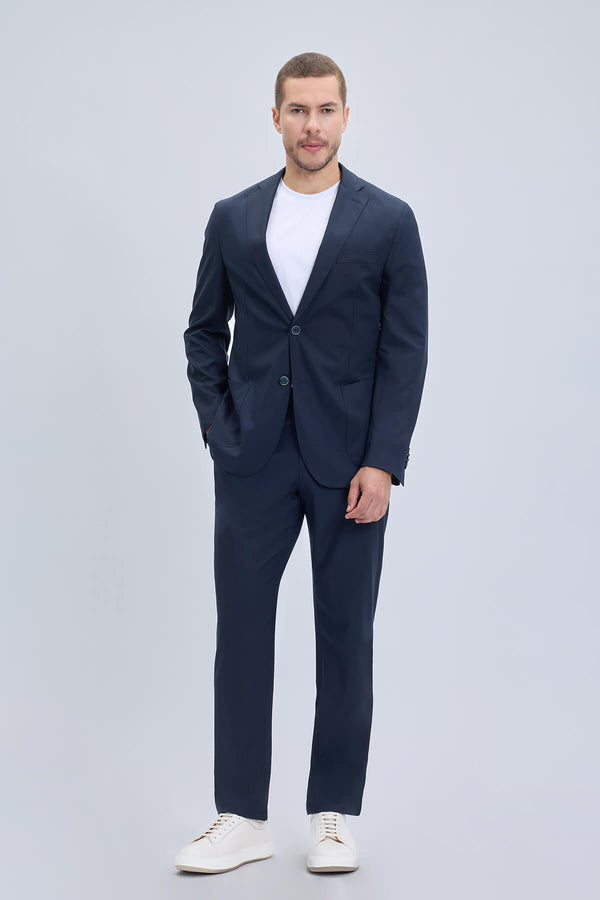
Numbers ready? Find your suit.
Compare your measurements against the SAYKI size chart and shop tailored suits built on a century of menswear craftsmanship.
Shop SuitsFrequently asked questions
A complete men's suit requires chest, waist, hip/seat, shoulder width, sleeve length, neck, trouser inseam, and trouser outseam. That's eight measurements in total. Chest size determines jacket size, while waist and seat size determine trouser size on most standard size charts.
Measurements should be accurate to within 0.25 inches for jacket fit and 0.5 inches for trouser length. Chest and shoulder measurements are the most unforgiving; an error of 1 inch in either can mean the jacket doesn't close or the shoulder seam sits in the wrong position.
Chest and waist circumference measurements can be taken alone, but shoulder width and sleeve length require a second person to get a reliable reading. Without a helper, these two measurements shift as the tape is repositioned, introducing errors of up to an inch.
Re-measure any time body weight changes by more than 10 pounds, or after a gap of more than two years since the last purchase. Chest and waist measurements shift gradually, and using old numbers for a new suit purchase is a common source of poor fit.
Suit sizes include built-in ease, typically 2 to 4 inches added to the chest measurement so the jacket closes and allows movement. A man with a 40-inch chest buys a size 40 jacket, but the jacket's actual chest circumference is closer to 44 inches. Always compare body measurements to a retailer's specific size chart rather than assuming the size number matches the body number.
Jacket chest measurements include ease allowance, while shirt chest measurements sit closer to the actual body size. Neck and sleeve measurements are used primarily for shirt sizing. When ordering a dress shirt to wear under a suit, measure neck and sleeve length separately rather than trying to derive them from jacket size.